Go right to the: Pictures - Plans
This pinhole camera is a bit more complex in its design, but solves some problems that I had with an earlier version. Also, the sliding, removable back is reused in Camera #3.
While you could duplicate this design, I suggest that you look it over, and then make your own from whatever materials you have on hand, as I did.
Materials
Camera Back
- 3/4" lumber, like pine, oak, whatever
- a couple hinges and a hasp
- some felt
- a couple pieces of sheet metal strip
- small nails
Camera Front
- 3/4" lumber, like pine, oak, whatever
- 1/4" thick plywood
- some felt
- plastic laminate (optional)
- a 2" X 2" piece cut from the side of an aluminum beverage can
- No. 10 sewing needle
Other Stuff
- glue
- flat black paint
- masking tape, black photographic type preferred
Building Procedure
- Look at the plans
- measure twice
- cut once
- glue and clamp
Making the Pinhole
Place the piece cut from the beverage can on a piece of cardboard. Hold the sewing needle firmly in a pair of pliers. Press the pointy end of the needle in the center of the aluminum and twist the pliers back and forth while applying pressure. Do not try to puncture the aluminum, just create a depression in it.
Turn the aluminum over and lightly sand or file the dent until the surface is flat again. Repeat the pressing with the needle and the sanding until the hole is big enough for the needle to go all of the way through.
Tape the pinhole over the front of the camera body. Attach a piece of black tape or paper to act as a shutter.
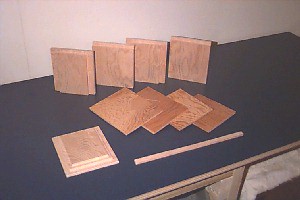 These are the parts of the camera back and front before assembly. These are the parts of the camera back and front before assembly. |
 This is the completed camera. This is the completed camera. |
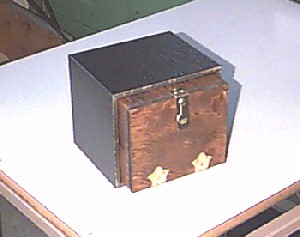 This is the camera from the rear with the back closed. This is the camera from the rear with the back closed. |
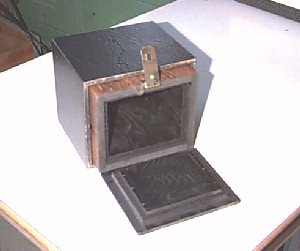 This is the camera from the rear with the back opened. This is the camera from the rear with the back opened. |
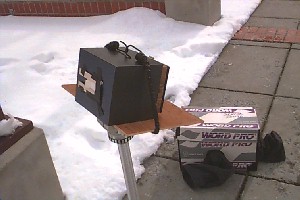 This is the camera in use. Notice the changing box in background. This is the camera in use. Notice the changing box in background. |
Plans
I have the following plans available for viewing.
| Dwg-101 |
This is the first of two drawings. It shows the layout of the details on the sheet and the key to the details below. |
| Detail 101-1 |
Detail of the hinged back, front and side. |
| Detail 101-2 |
Detail of the hinged back, from the inside. |
| Detail 101-3 |
Body side piece, 2 views. |
| Detail 101-4 |
Body top piece, 2 views. |
| Dwg-102 |
This is the second of two drawings. It shows the layout of the camera body front, for both the pinhole and lensed cameras. Only links to the pinhole details are included here. See the Camera #3 page for the others. |
| Detail 102-1 |
Detail of the camera body front. |
| Detail 102-2 |
Detail of the camera body front. |
|
|

